What are Custom Nodes ?
Custom nodes are extensions for ComfyUI that add new functionality like advanced image processing, machine learning fine-tuning, color adjustments, and more. These community-developed nodes can significantly expand ComfyUI’s core capabilities.
Before installing custom nodes, it’s important to review them carefully. Since ComfyUI is an open-source project, malicious plugins could potentially exploit custom nodes:
- Only install custom nodes from trusted authors and those commonly used by the community
- Understand the plugin’s functionality before installing and avoid unknown sources to ensure system security
- Avoid installing obscure or suspicious plugins - unverified plugins may pose security risks that could lead to system compromise
- Clone the node code to the
ComfyUI/custom_nodes directory
- Install the required Python dependencies
This guide covers three installation methods. Here’s a comparison of their pros and cons. While ComfyUI Manager isn’t yet part of the core dependencies, it will be in the future. We still provide other installation guides to meet different needs.
| Method | Advantages | Disadvantages |
|---|
| ComfyUI Manager (Recommended) | 1. Automated installation
2. Dependency handling
3. GUI interface | Cannot directly search for nodes not registered in the registry |
| Git Clone | Can install nodes not registered in the registry | 1. Requires Git knowledge
2. Manual dependency handling
3. Installation risks |
| Repository ZIP Download | 1. No Git required
2. Manual control | 1. Manual dependency handling
2. No version control
3. Installation risks |
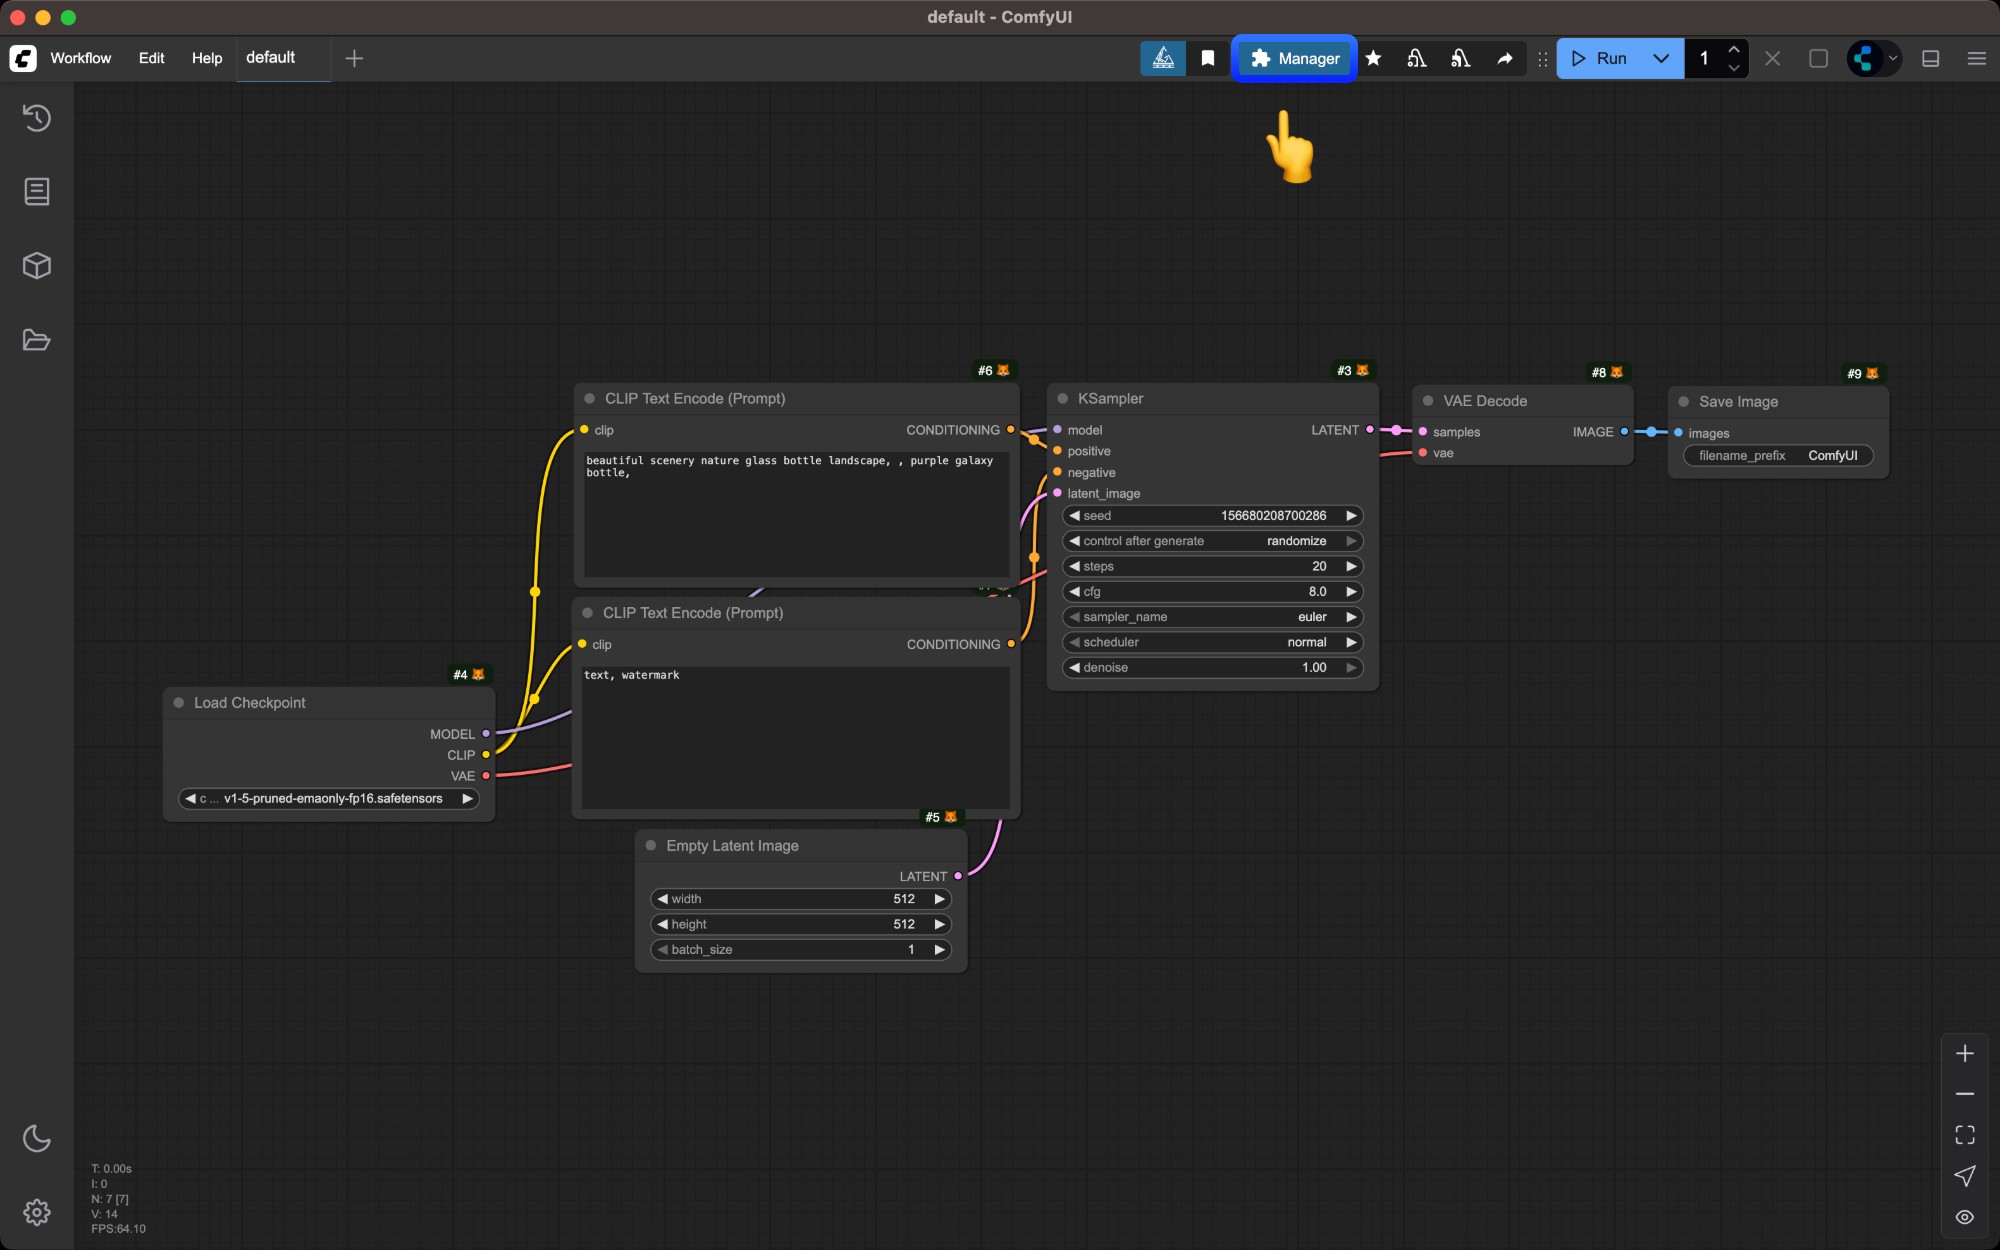
Method 1: ComfyUI Manager (Recommended)
Click the `Manager` button in ComfyUI interface
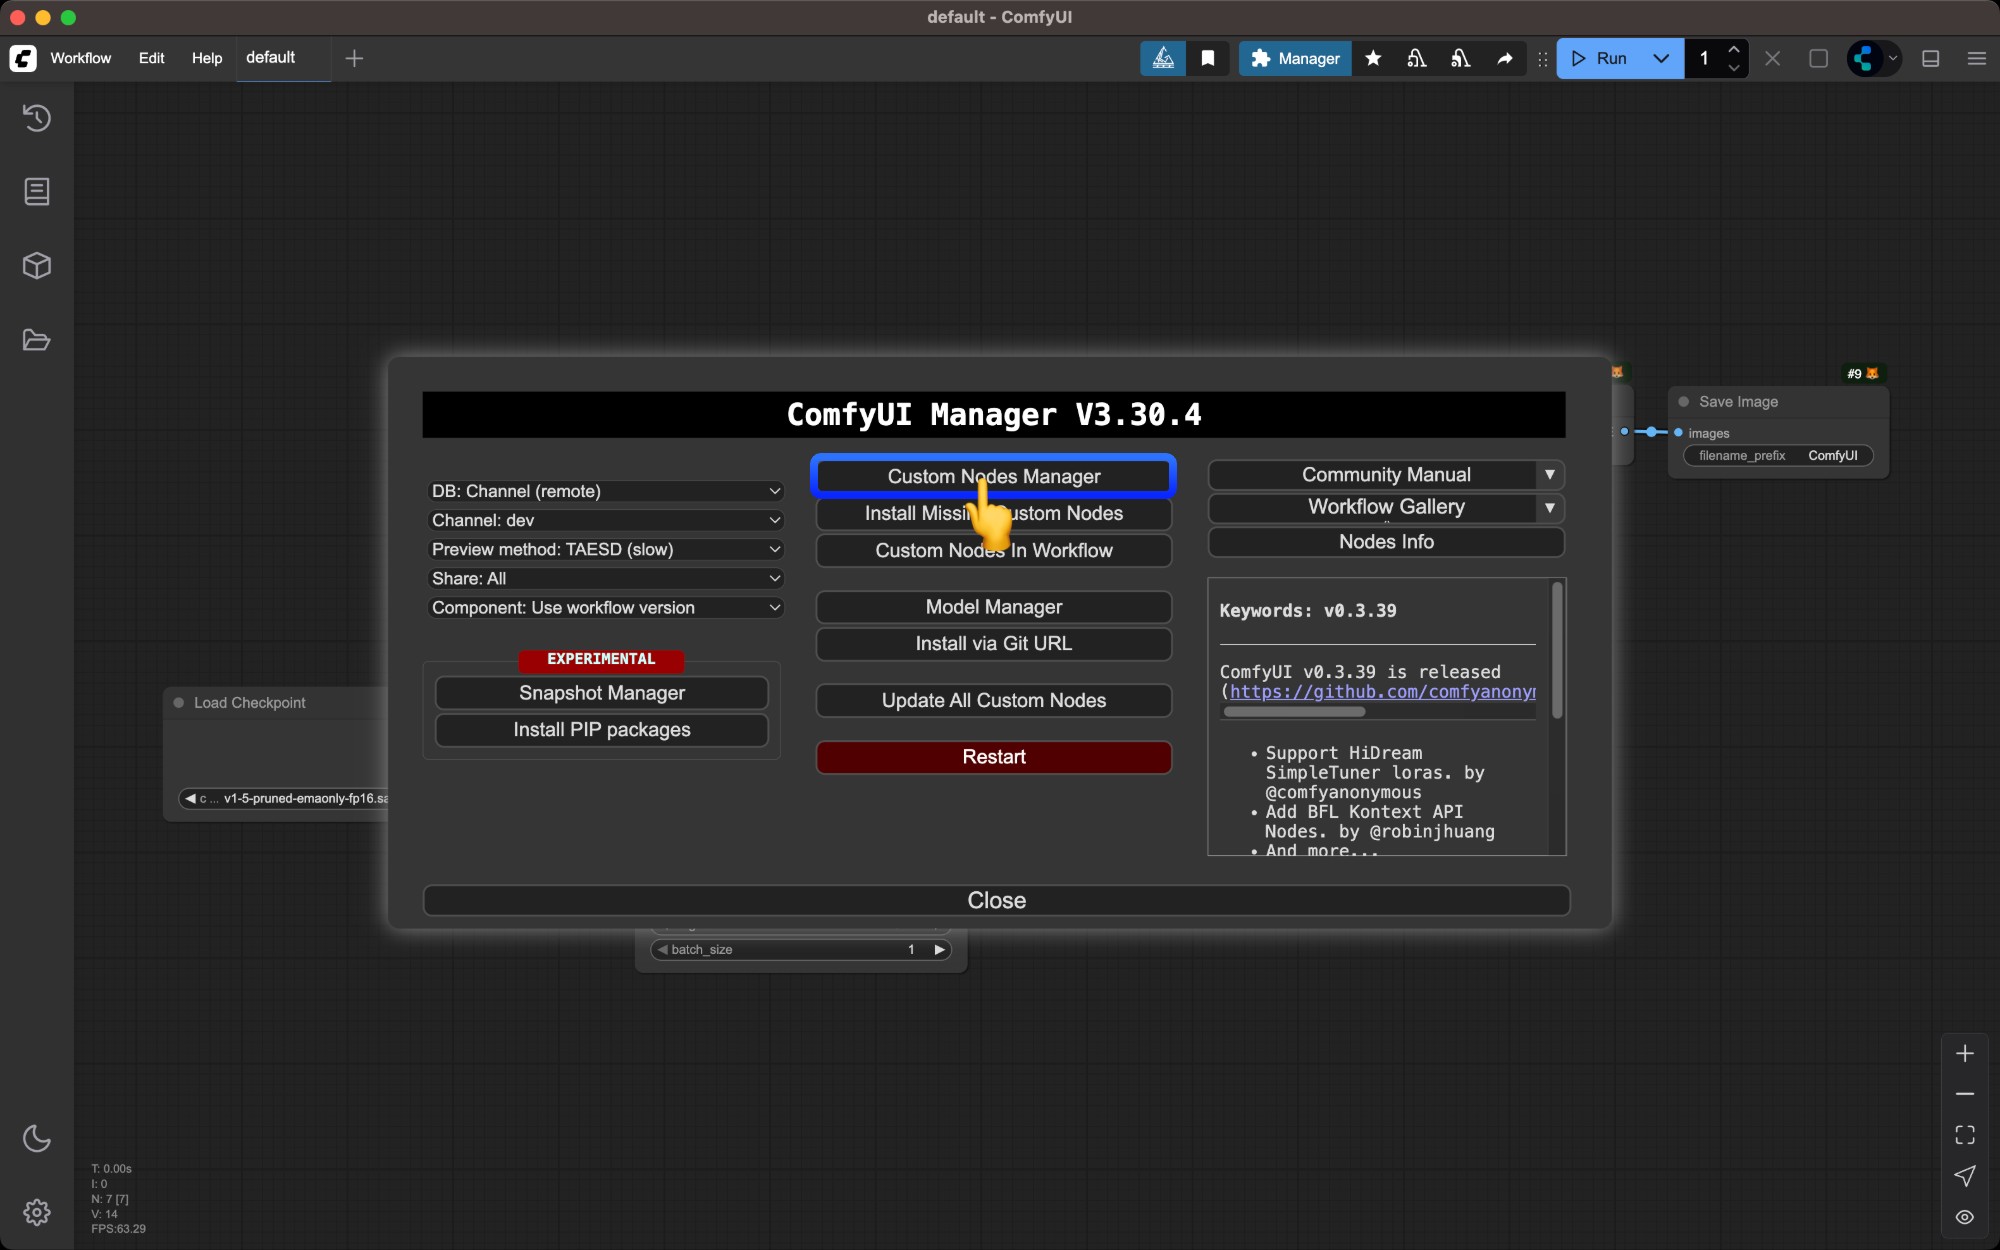
Select `Install Custom Nodes`
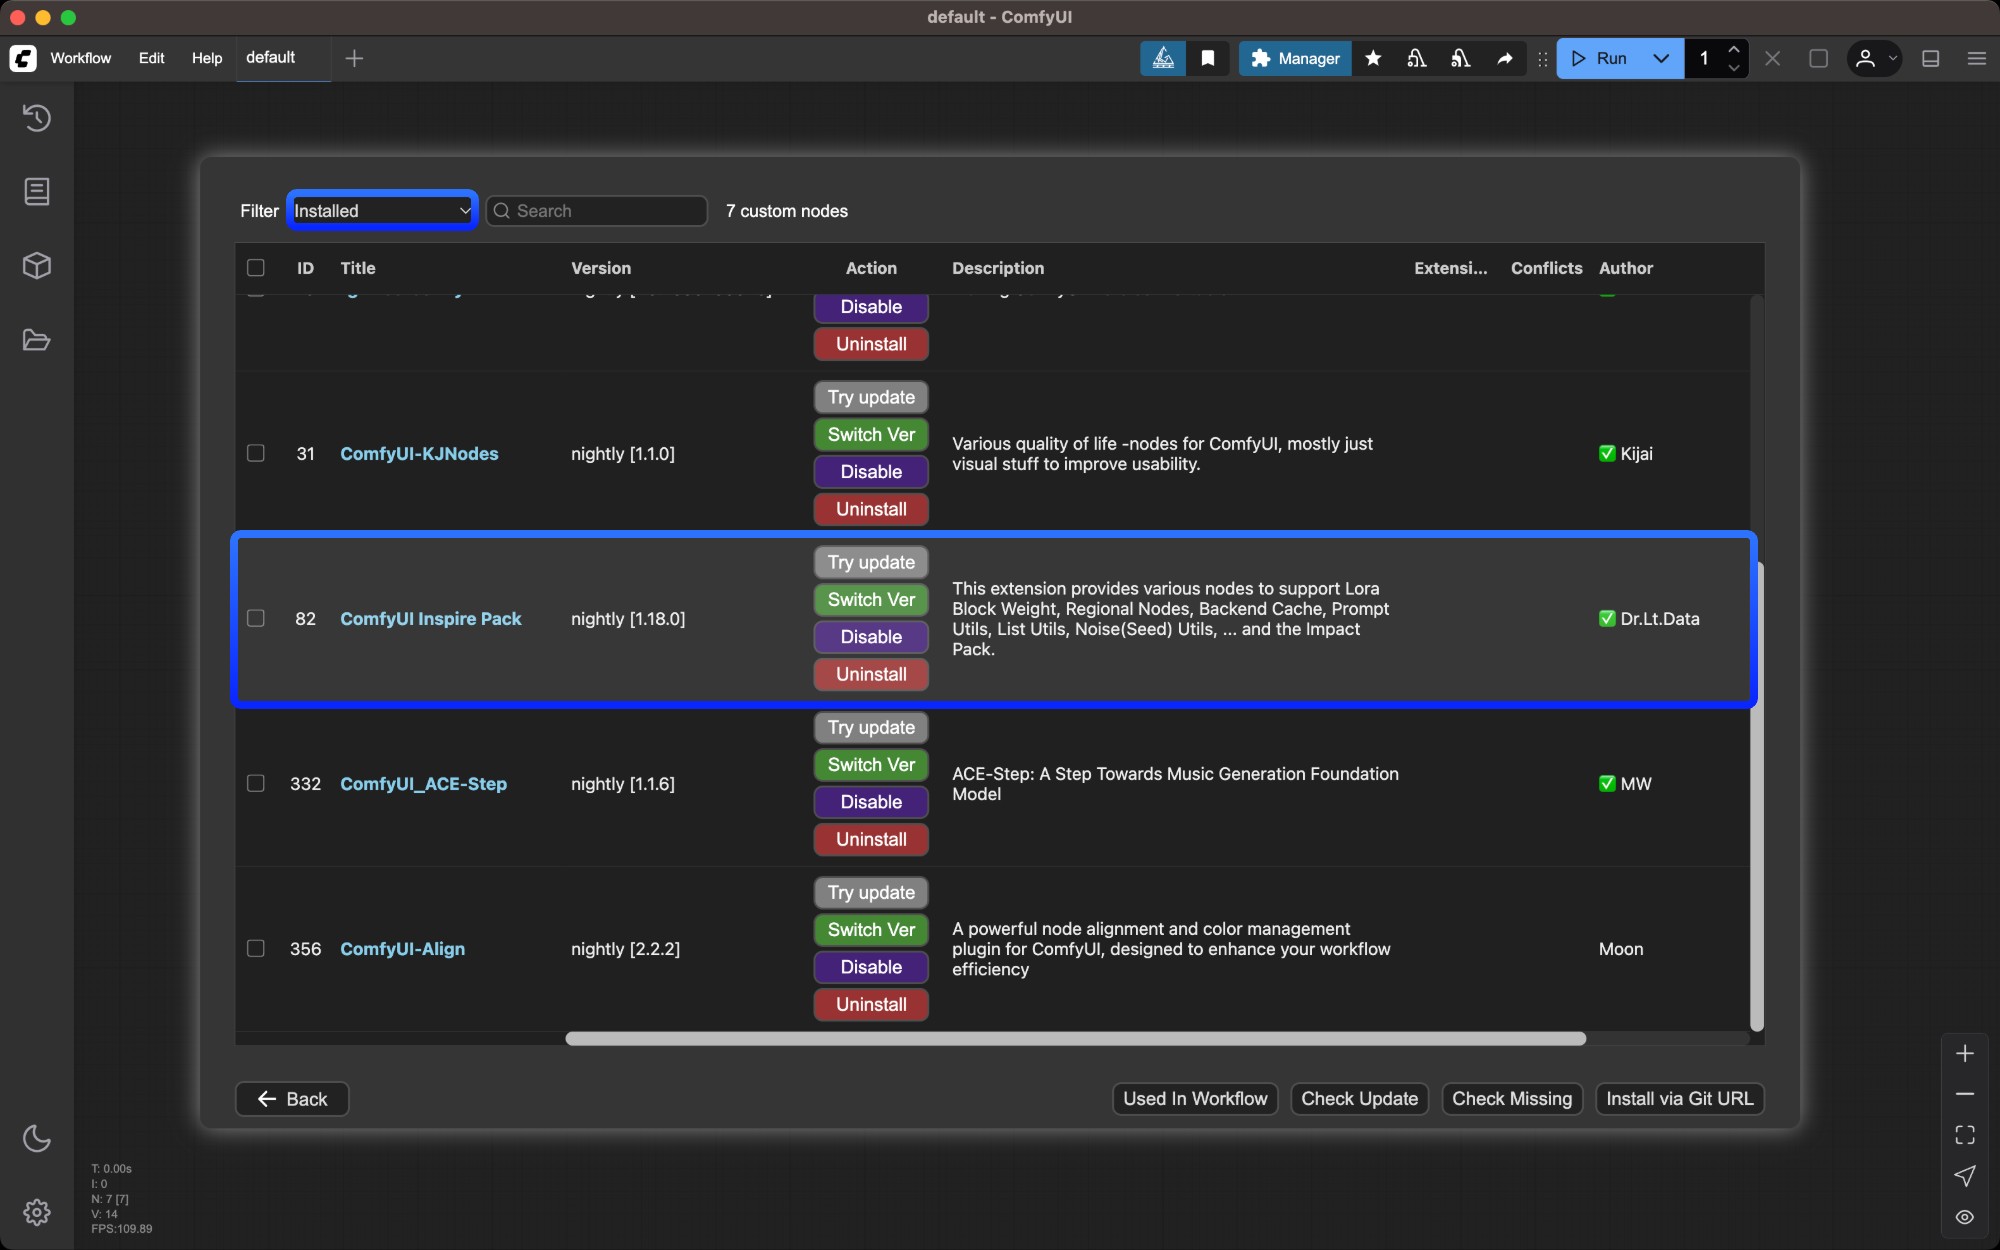
Browse the custom nodes list
Custom nodes listed in ComfyUI Manager aren’t necessarily safe. Understand their functionality before installing and ensure you only install trusted plugins and those from popular authors to avoid potential device risks.
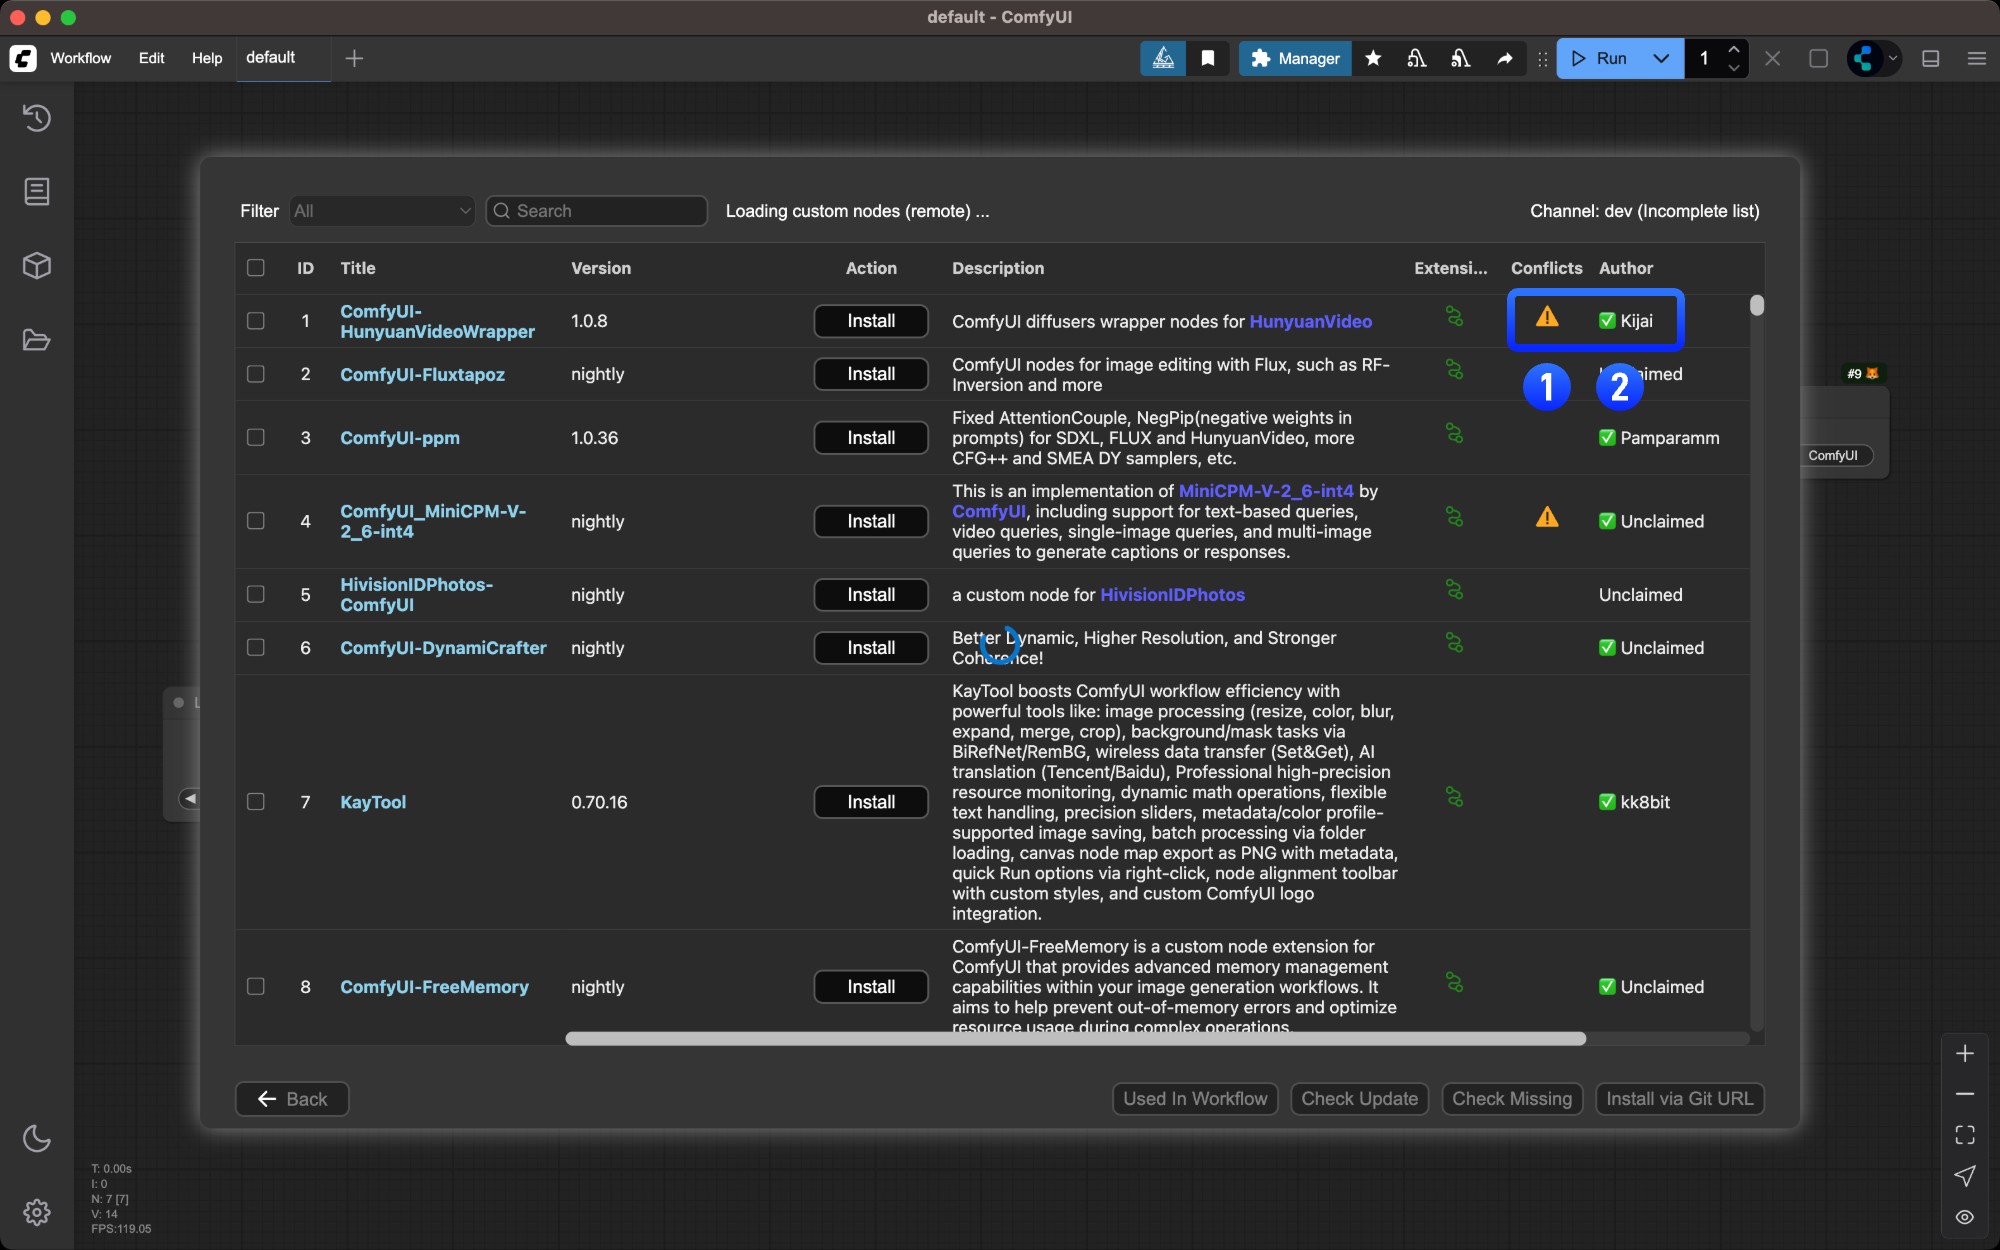
- Nodes marked with
⚠️ may have dependency conflicts with other plugins
- Author names marked with
✅ indicate their activity level on Github
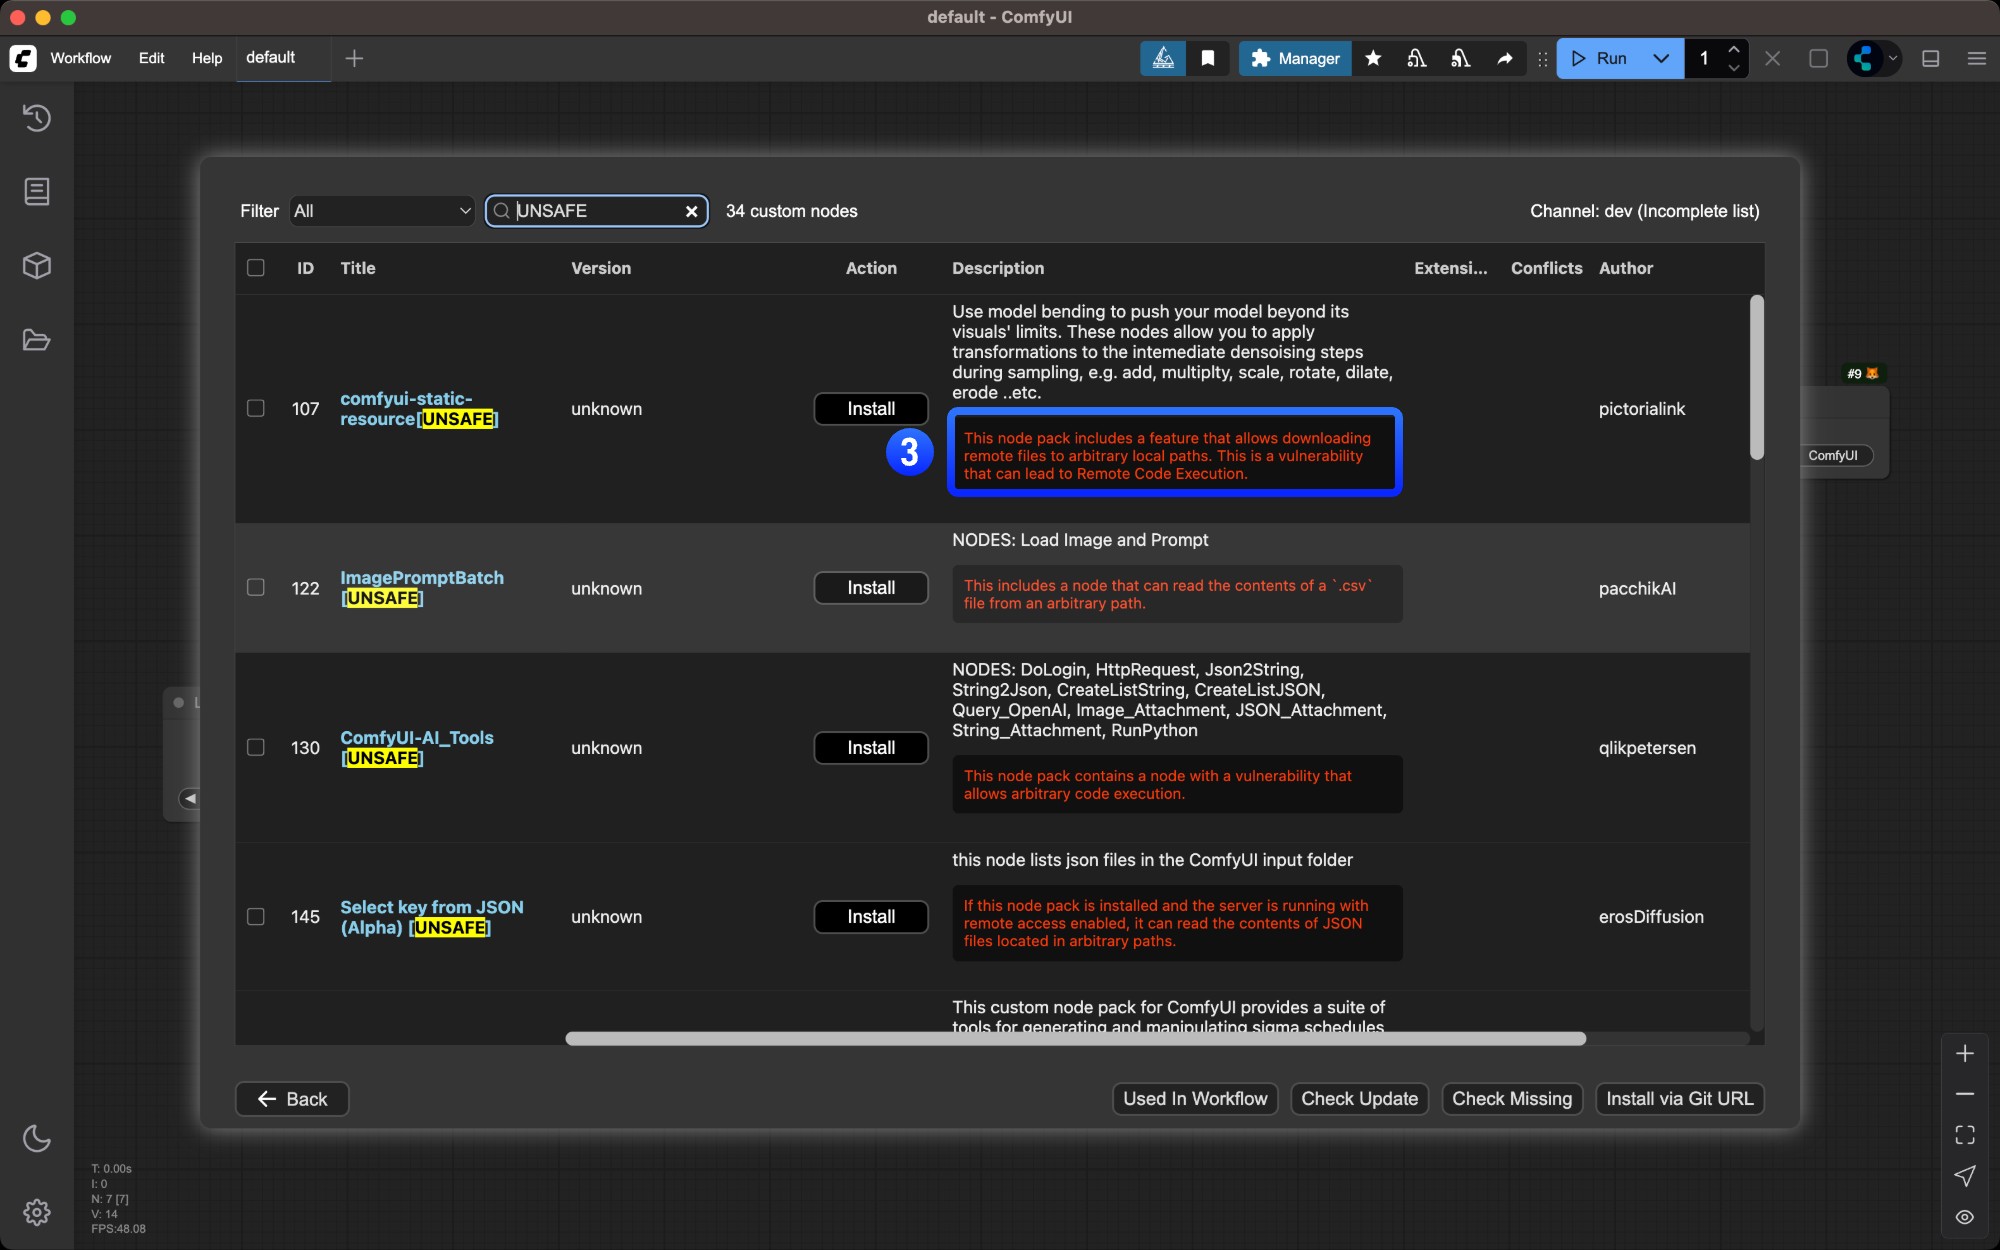
- Potential plugin risks are highlighted in red - ensure plugin safety before installing
Click the `Install` button for the desired node
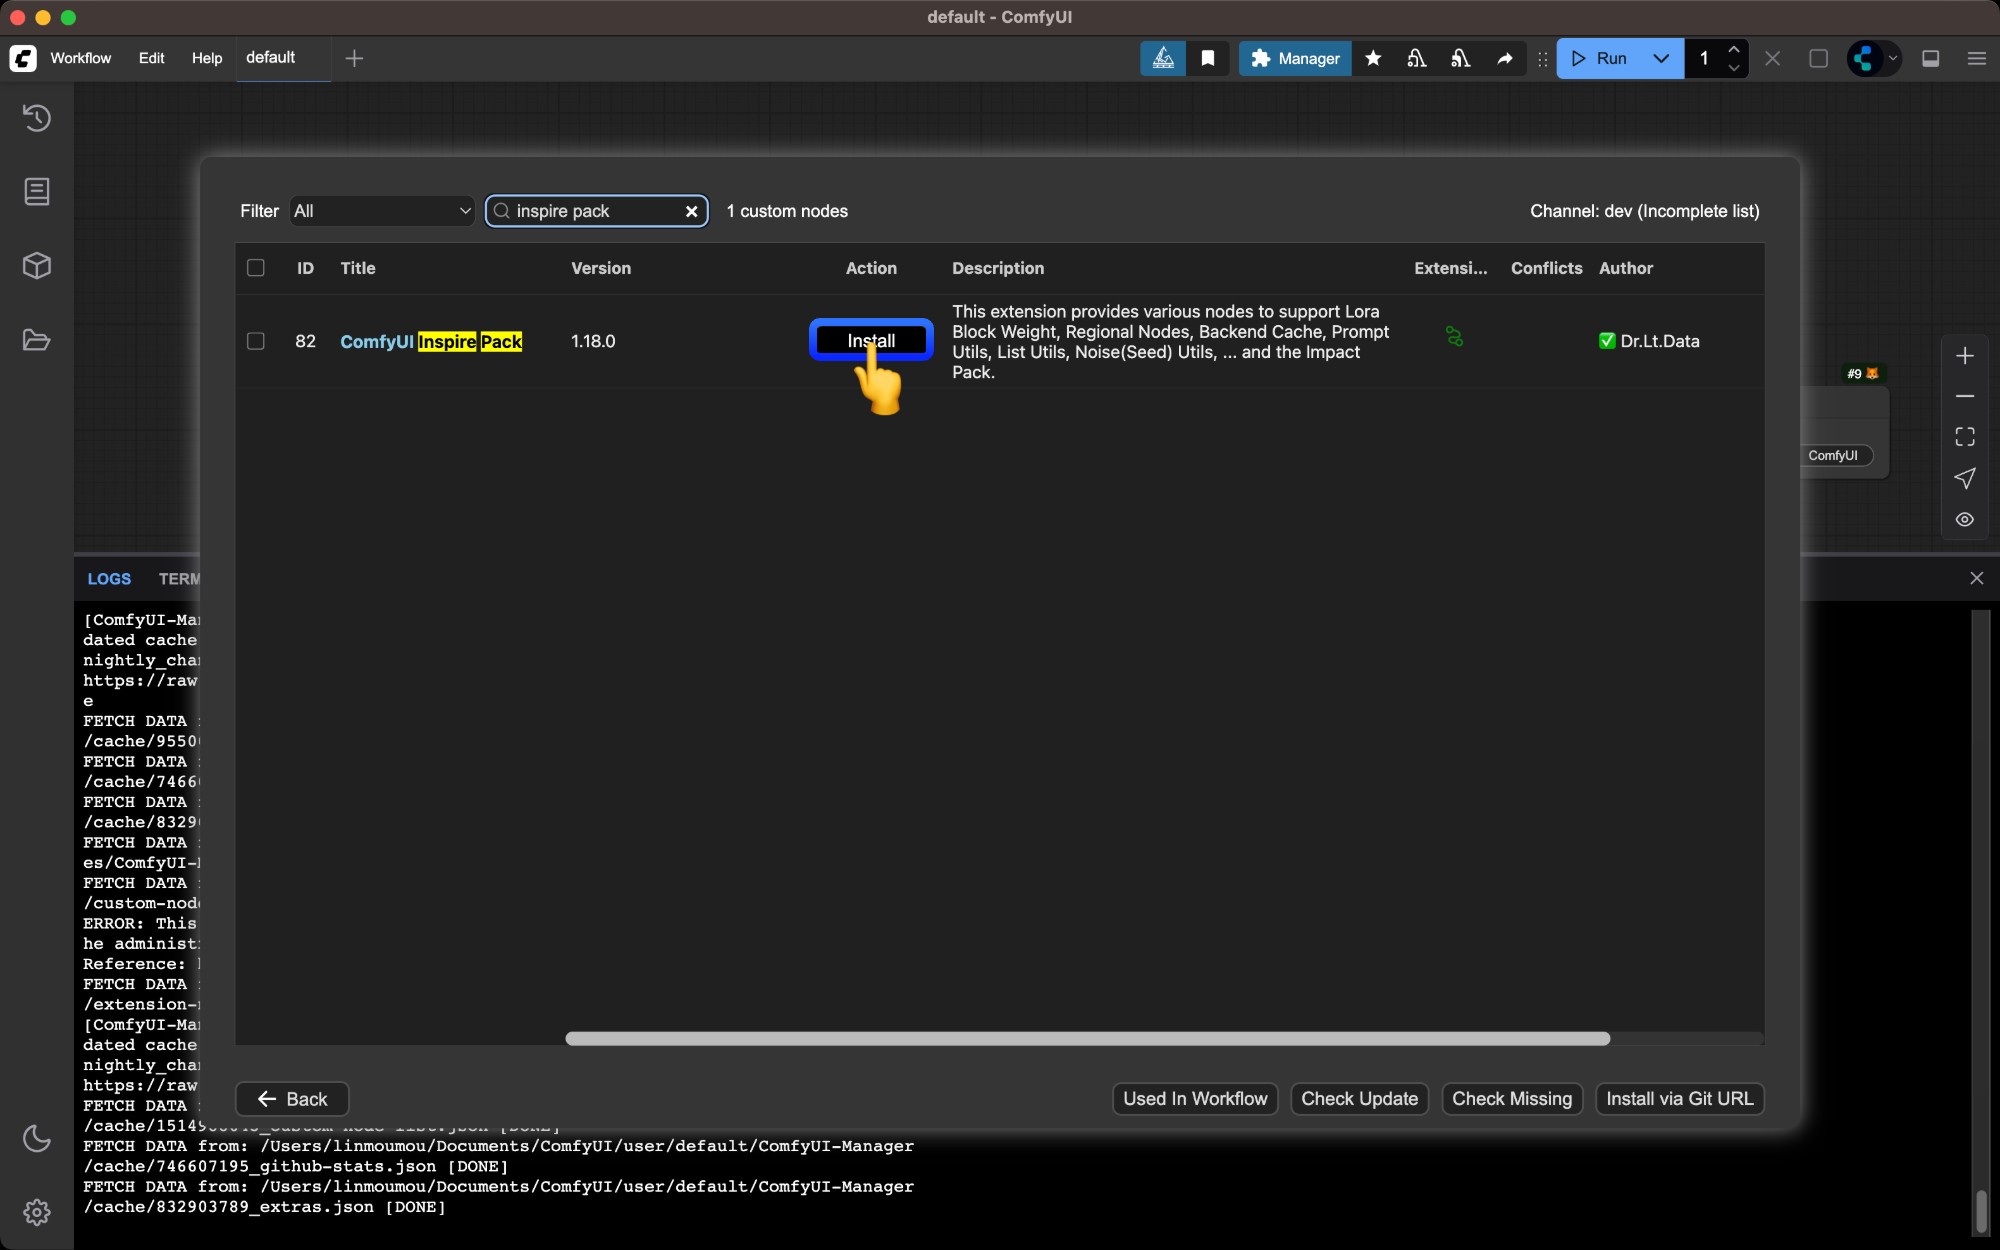 Find the node you want to install and click the
 Install button
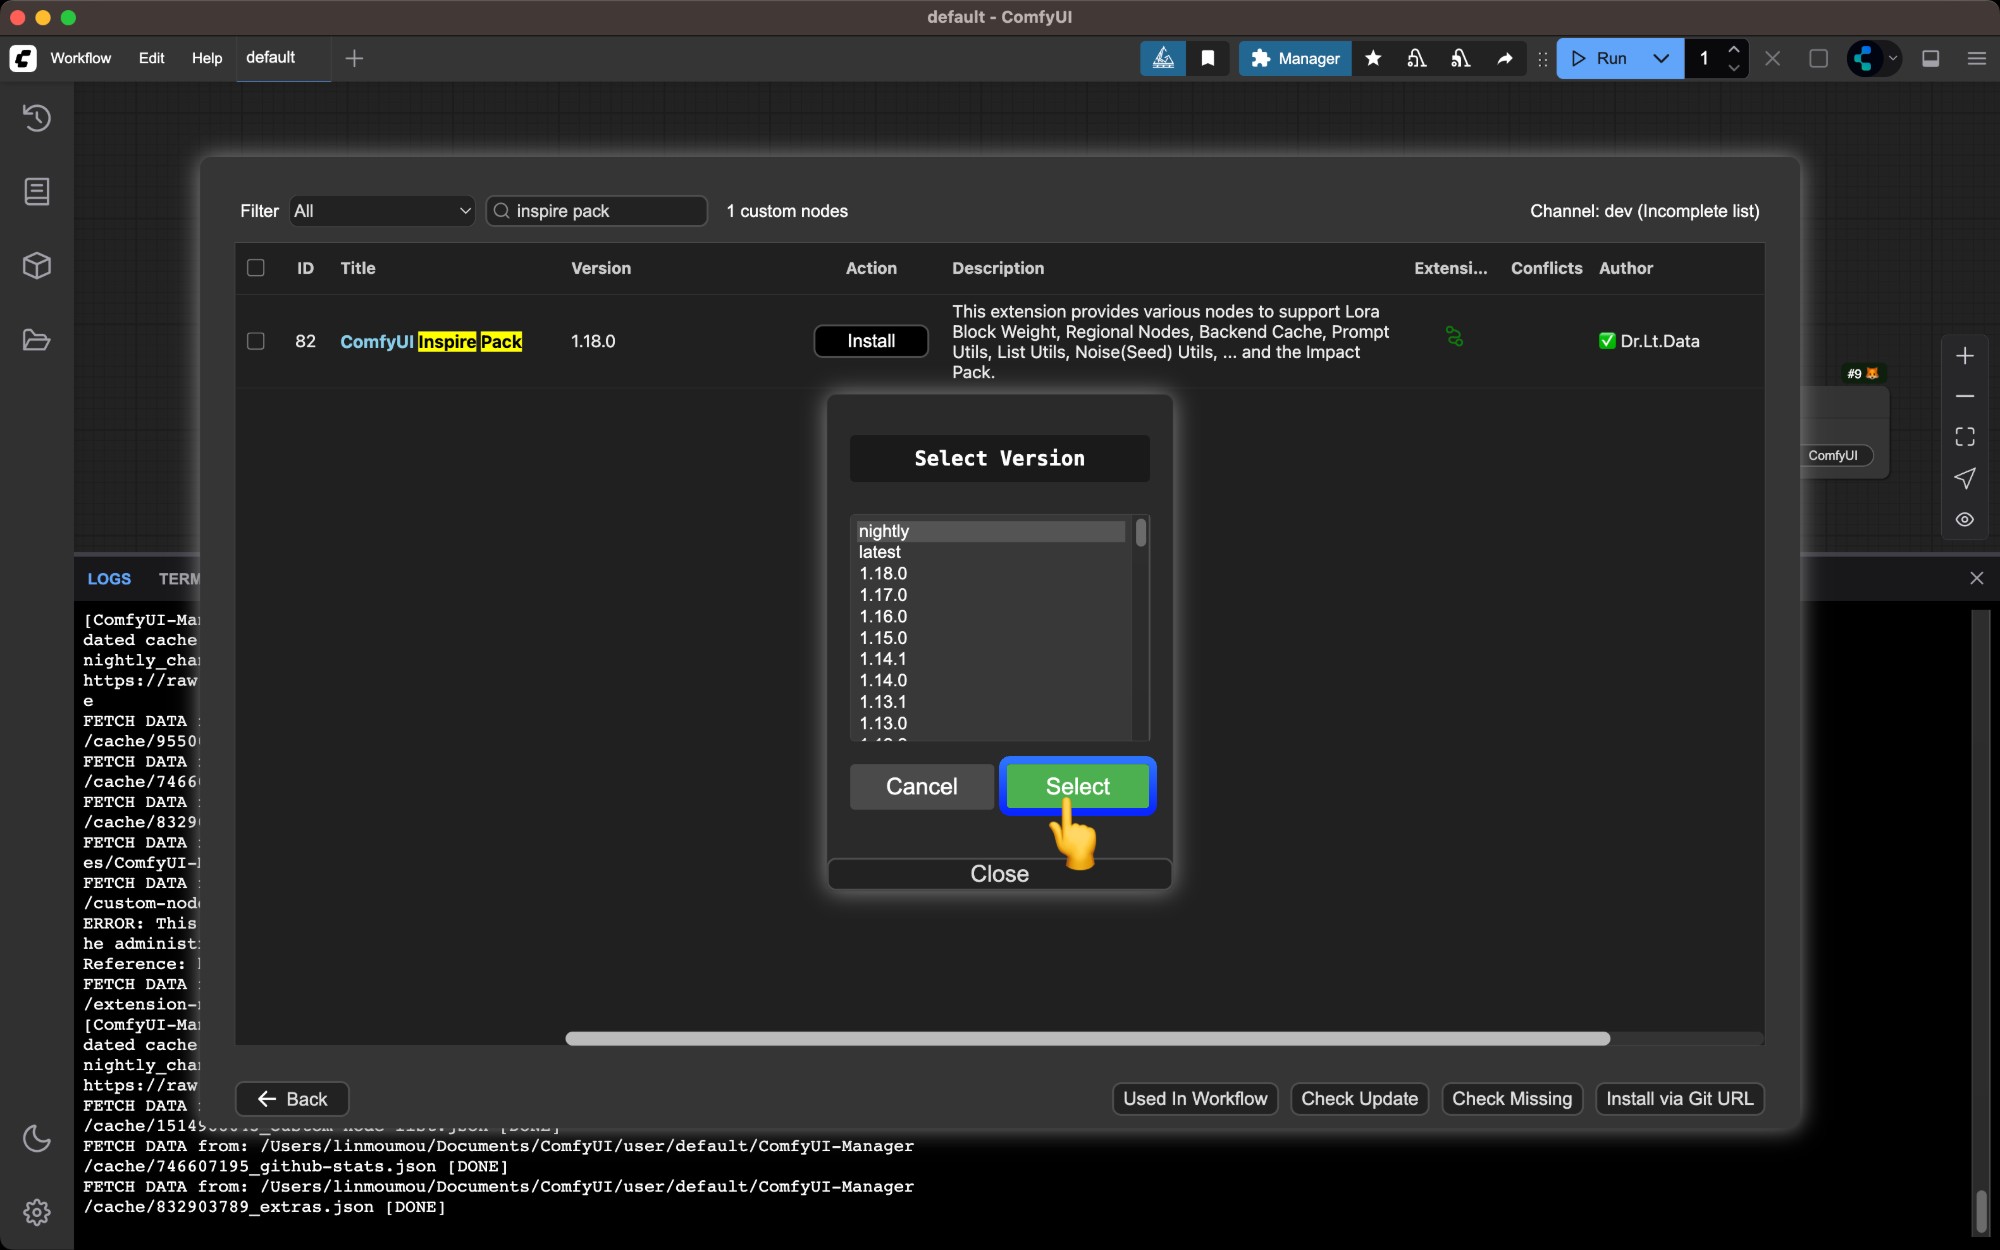 A version selection window will pop up:
nightly version: Downloads the latest source code directly from Github. However, when security_level is set to normal, you’ll get a warning that the current security settings don’t allow downloading this pluginlatest or numbered stable versions (recommended): Downloads reviewed code from https://registry.comfy.org/ that won’t trigger security checks
The nightly version is usually the latest version, but since it downloads unreviewed code directly from Github, there are certain security risks. If you must install the nightly version, set Manager’s security_level to weak
The config file path is ComfyUI/user/default/ComfyUI-Manager/config.ini, but note this is not our recommended configuration and should only be used temporarily
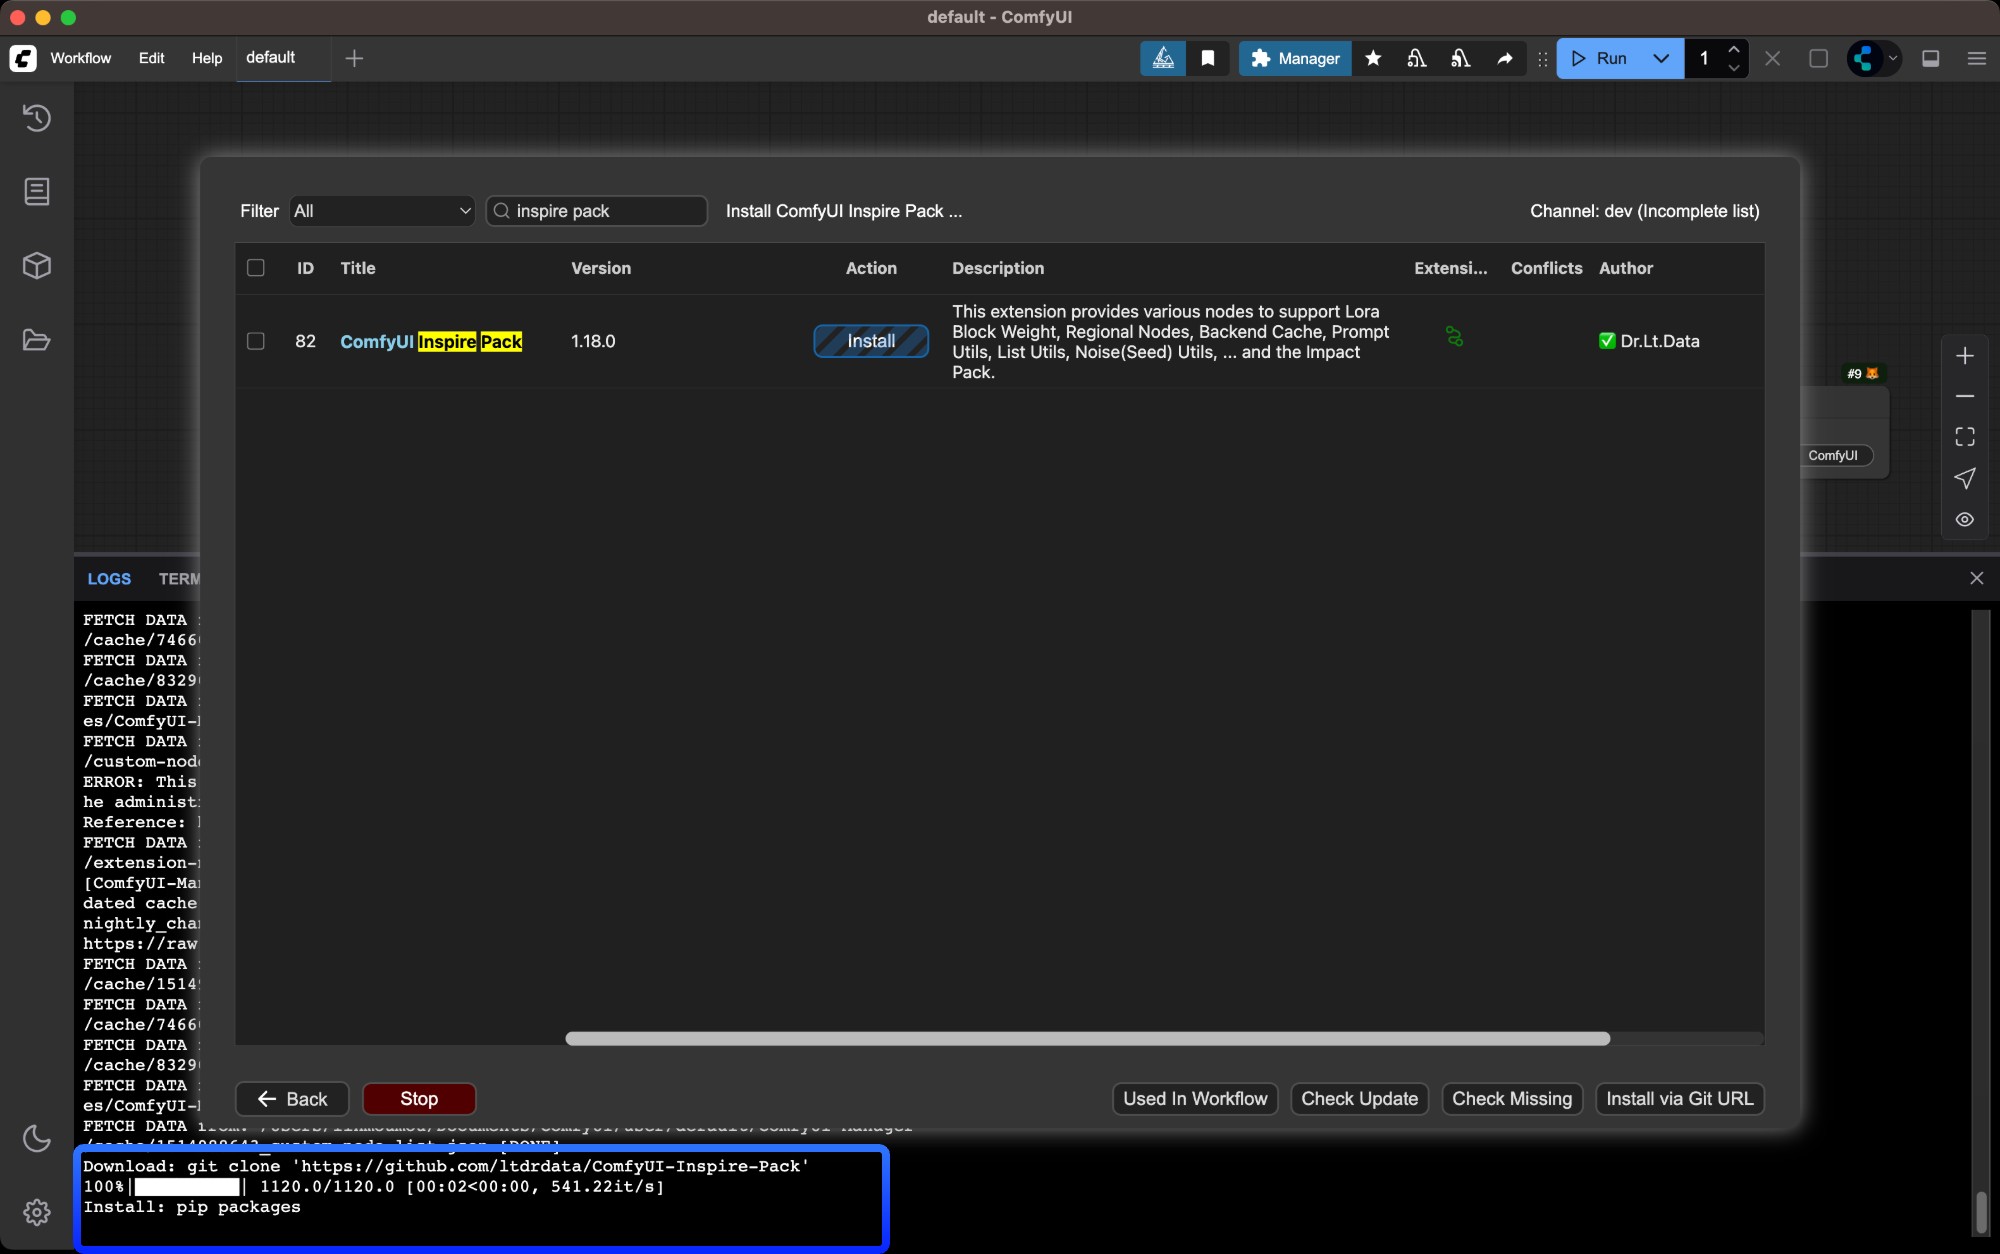
Wait for dependencies to install and restart ComfyUI
Manager will automatically install dependencies and prompt you to restart ComfyUI when complete
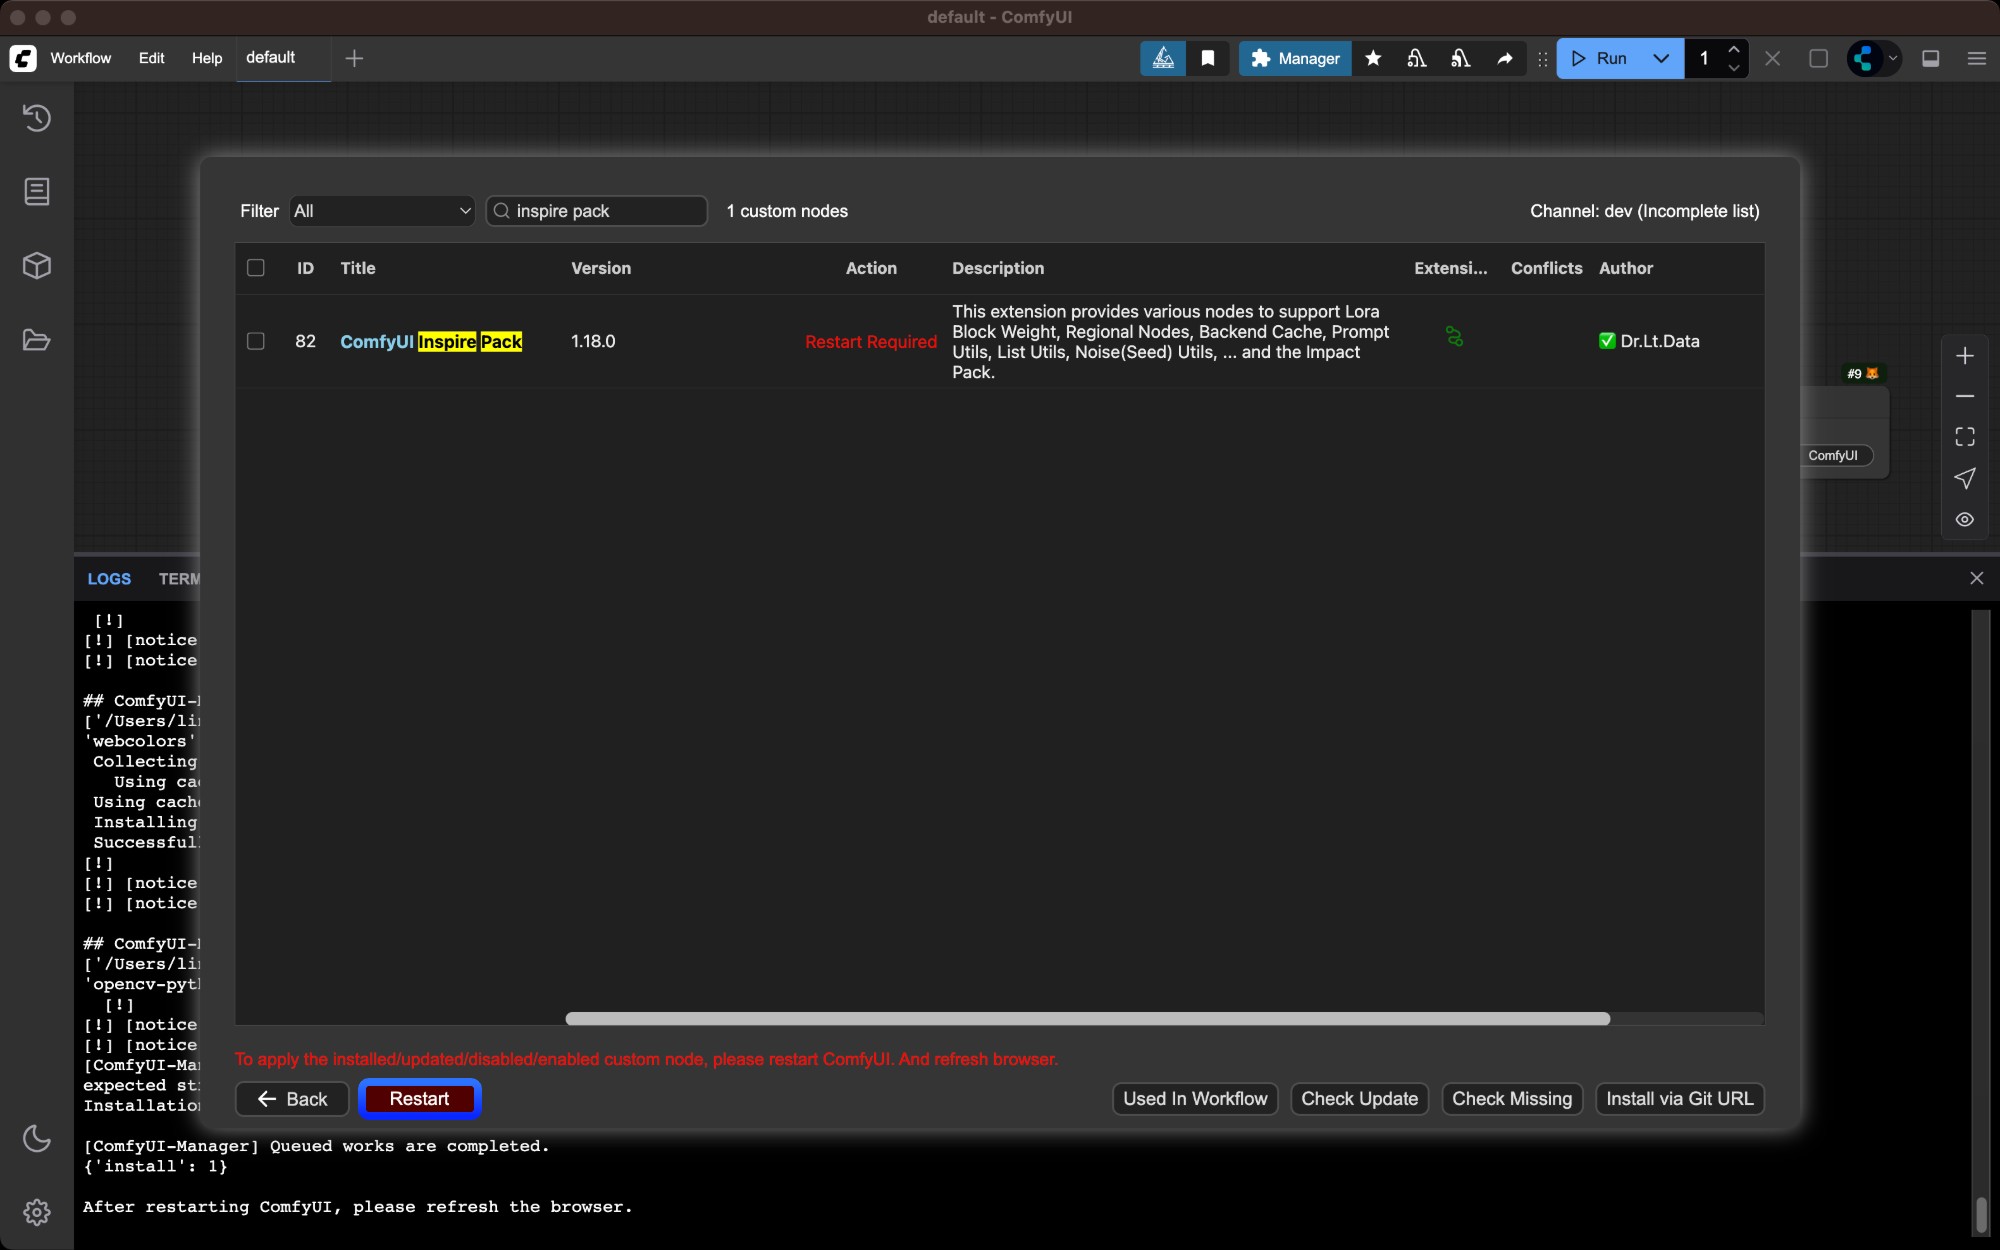
Verify successful installation
Check ComfyUI Manager after restart to confirm the plugin installed successfully and there are no import failed errors
Method 2: Manual Installation Using Git
Suitable for new nodes not found in Manager or when specific versions are needed. Requires Git installed on your system.
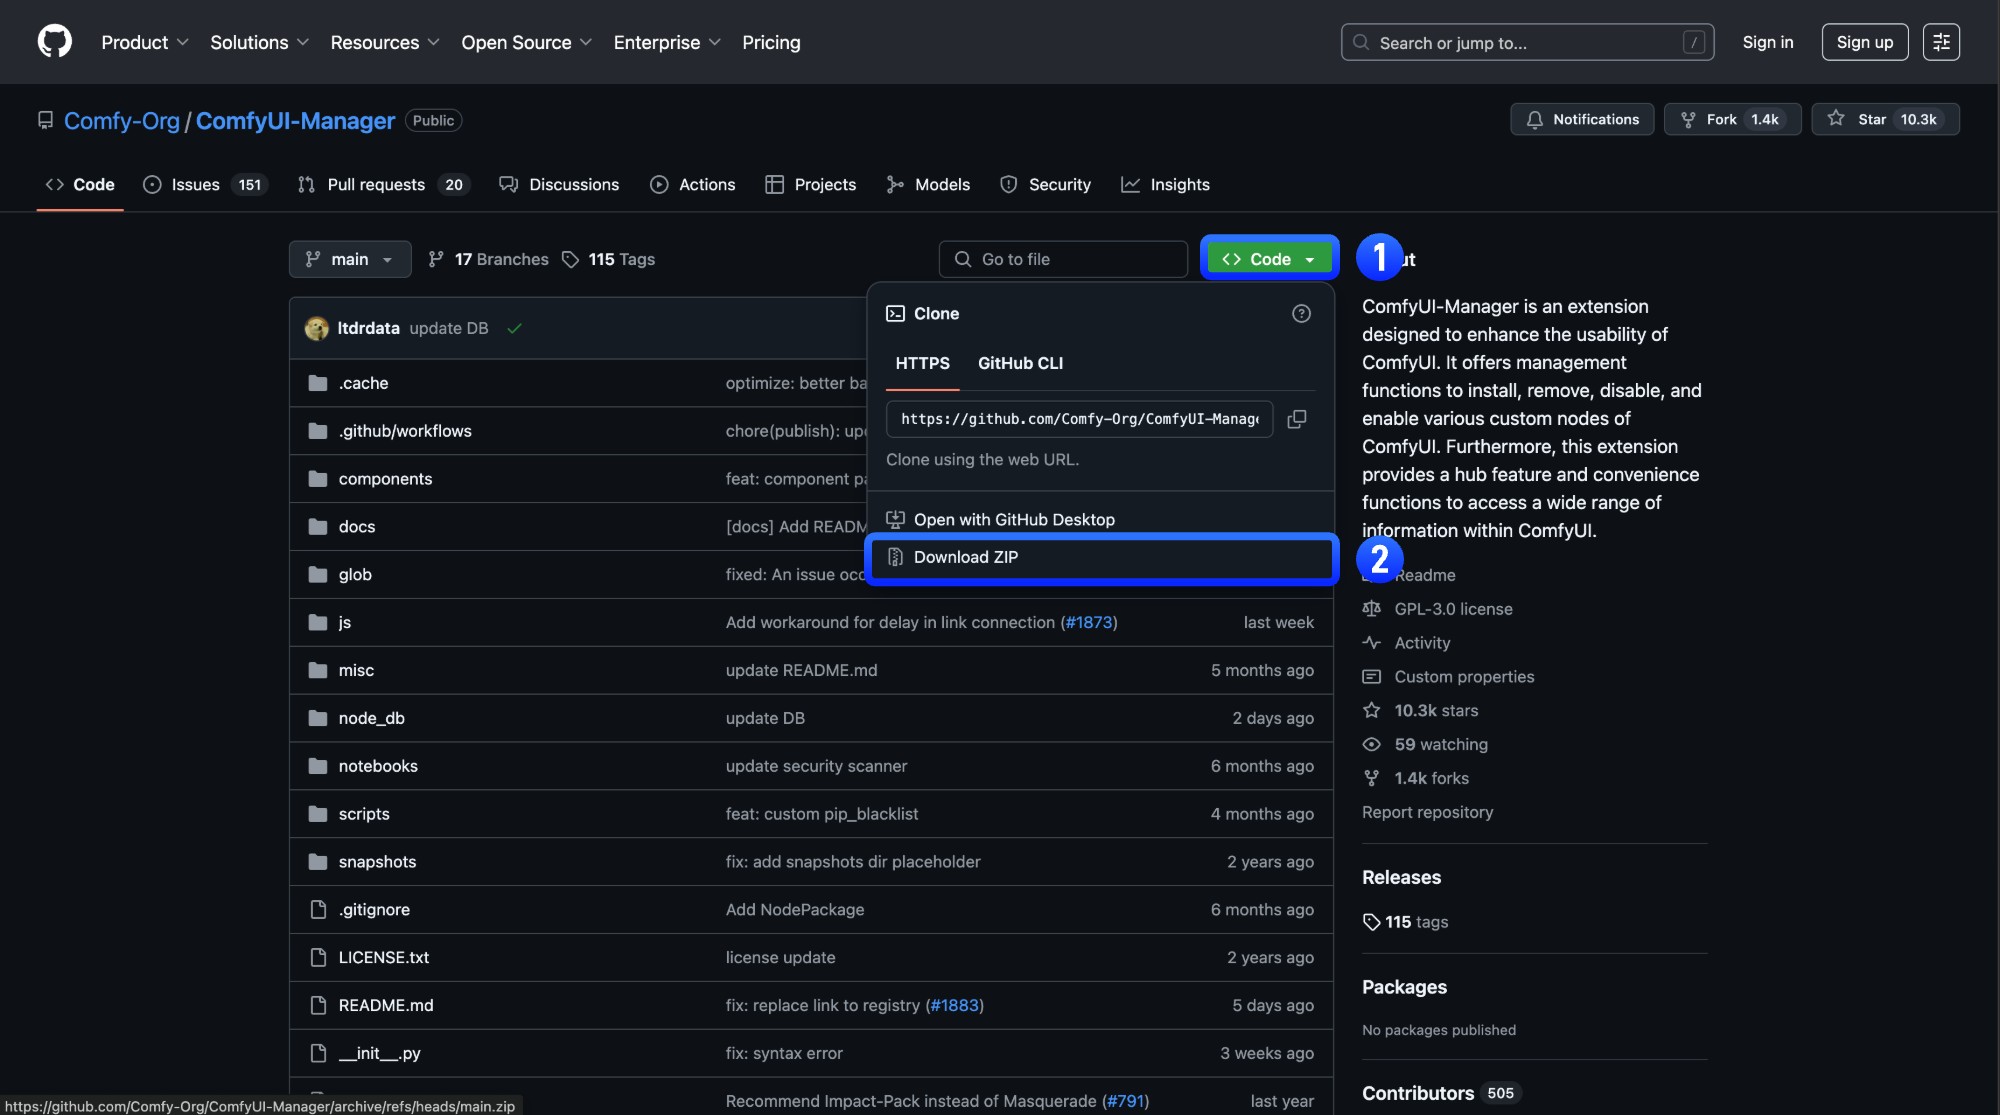
Get the repository URL
Click the “Code” button on GitHub and copy the HTTPS link
Navigate to custom_nodes directory
cd /path/to/ComfyUI/custom_nodes
Clone the repository
git clone [repository URL]
Install dependencies
Dependencies must be installed in your ComfyUI environment - be careful not to mix with your system environment to avoid contamination Windows Portable
Manual Install
For Windows portable version, install dependencies in the embedded Python environmentpython_embeded\python.exe -m pip install -r ComfyUI\custom_nodes\[node directory]\requirements.txt
Install dependencies in your ComfyUI environmentcd [node directory]
pip install -r requirements.txt
Restart ComfyUI and refresh browser
Restart ComfyUI and refresh your browser. Check startup logs for any import failed errors
Method 3: ZIP Download Installation
Suitable for users who cannot use Git or Manager
We don’t recommend this installation method as it loses version control capabilities
Click `Code` → `Download ZIP` on GitHub
Click Code → Download ZIP on the GitHub page
Extract the ZIP file
Extract the downloaded ZIP file
Copy extracted folder to `ComfyUI/custom_nodes/` directory
Copy the extracted folder to ComfyUI/custom_nodes/ directory
Install dependencies manually (same as Git method step 4)
Restart ComfyUI and refresh browser
Verify successful installation
Check ComfyUI Manager after restart to confirm the plugin installed successfully and there are no import failed errors